
Tutorial: Set Up a Project

Now we're ready to get started with some coding. The first step is to set up a project file so that Wing can find and analyze your source code and store your work across sessions.
If you haven't already copied the tutorials directory from your Wing installation, please do so now as described in Tutorial: Getting Started.
Wing starts up initially with the default project. Instead of using that, create a new project now with New Project in the Project menu. Select Create Blank Project on the local host and then click on OK:

Wing will display a confirmation dialog after creating the new blank project:

Click Save Now to save the new project. Use tutorial.wpr as the project file name and place it in the tutorial directory that you created earlier.
Next, use the Add Existing Directory item in the Project menu to add your copy of the tutorials directory. Leave the default options checked so that all files in that directory are added to the project.
Opening Files
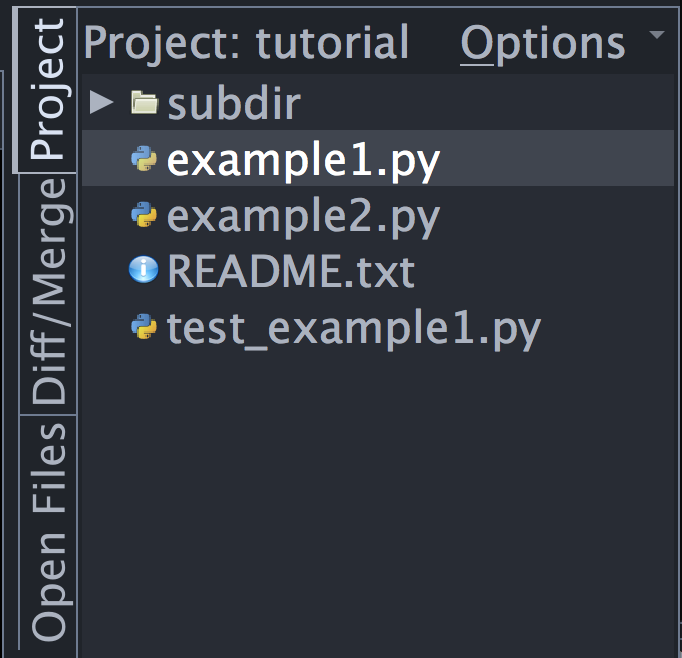
Files in your project can be opened by double-clicking in the Project tool, by typing fragments into the Open From Project dialog, and in other ways that will be described later.
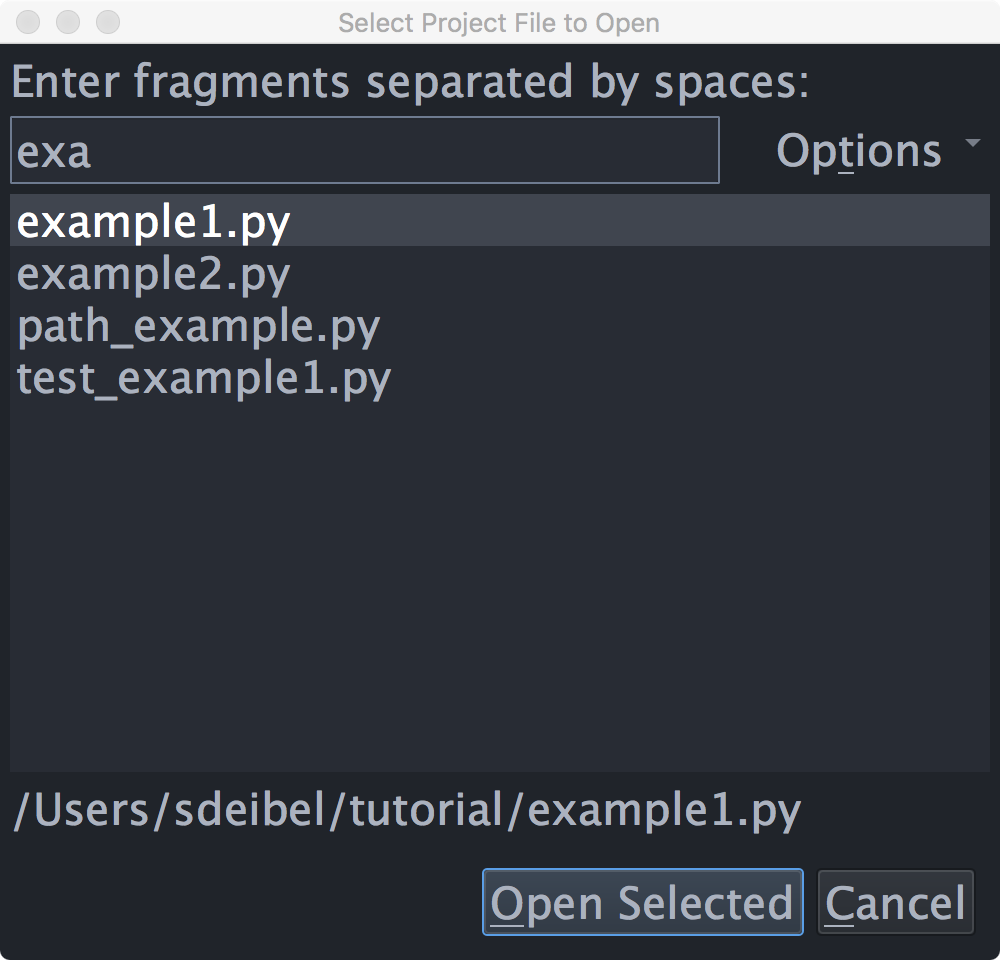
Try Open From Project now, from the File menu. Type ex as the file name fragment and then use the arrow keys and press Enter to open the file example1.py. Now try it again with the fragment sub ex. This matches only files with both sub and ex in their full path names. In larger projects, Open From Project is usually the easiest way to open a file, so you'll probably want to learn the key binding listed for this command in the File menu. The binding varies according to which keyboard personality you have chosen to use.
Transient, Sticky, and Locked Files
Wing opens files in one of several modes, in order to keep more relevant files open while auto-closing others. To see this in action, click on os in import os at the top of example1.py and press F4 to go to the definition of os. The file os.py will be opened in non-sticky transient mode, so that it is automatically closed in least-recently-used order when you navigate away from it to other files.
The mode in which a file is opened is indicated with an icon in the top right of the editor area:
![]() - The file is sticky and will be kept open until it is closed by the
user.
- The file is sticky and will be kept open until it is closed by the
user.
![]() - The file is non-sticky and may be closed when it is no longer
visible. When a non-sticky transient file is edited, it immediately converts to sticky.
- The file is non-sticky and may be closed when it is no longer
visible. When a non-sticky transient file is edited, it immediately converts to sticky.
![]() - The file is locked in the editor, so that the editor split will not be
used to display other newly opened files. This mode is only available when multiple
editor splits are present.
- The file is locked in the editor, so that the editor split will not be
used to display other newly opened files. This mode is only available when multiple
editor splits are present.
Clicking on the stick pin icon toggles between the available modes. Right-clicking on the icon displays a menu of recently visited files. This contains both non-sticky transient and sticky files, while the Recent list in the File menu contains only sticky files.
The number of non-sticky transient editors to keep open, in addition to those that are visible, is set with the Editor > Advanced > Maximum Non-Sticky Editors preference (default=5).
This mechanism is also used in multi-file searching, debugging, and other features that navigate through many files. In general you can ignore the modes and Wing will keep open the files you are actually working on, while auto-closing those that you have only visited briefly.
Shared Project Files
Wing Pro writes two files for each project, for example tutorial.wpr and tutorial.wpu. If you plan to use Wing projects with a revision control system such as Git, Mercurial, or Perforce, you should check in only the *.wpr file.
See the Sharing Projects documentation page for details.